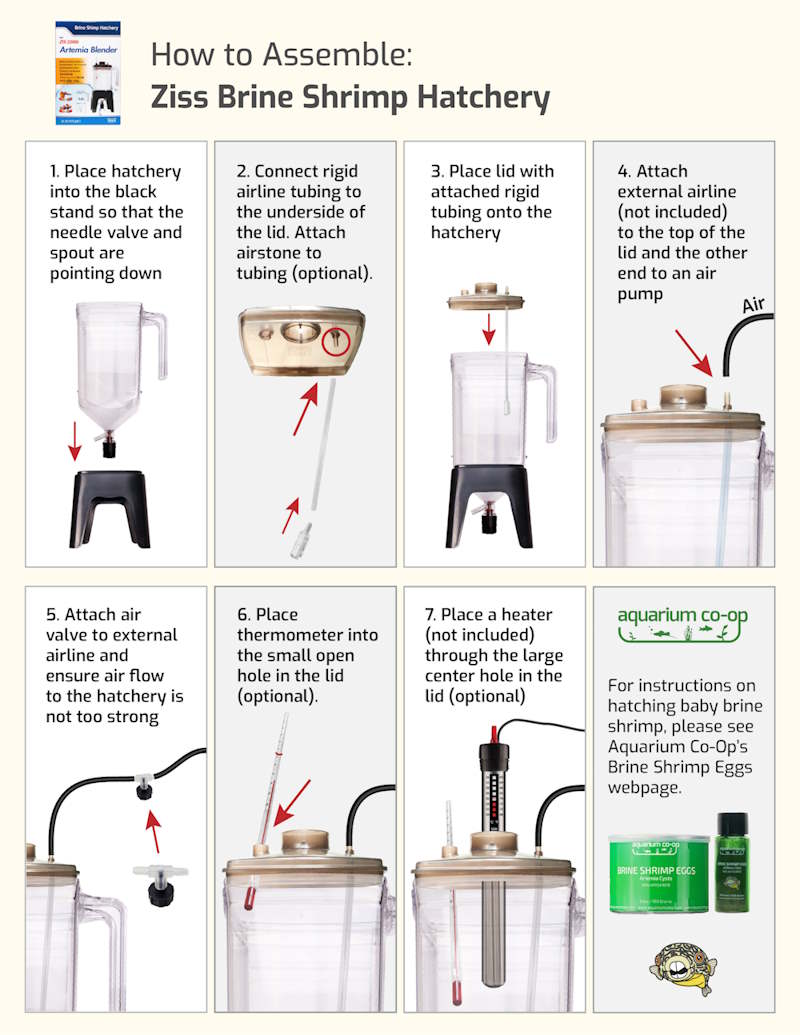
The hatchery kit comes with:
– Hatchery with needle-type valve
– Hatchery lid
– Hatchery stand
– Height extenders for the stand (2)
– Thermometer (measures in Celsius) with o-ring
– Rigid airline tubing
– Pipette
– Air stone (may be different than what is pictured)
– Air valve
Note: The height of the hatchery with the stand is about 12.75 inches (32.3 cm), and the height of the hatchery with the stand and height extenders is about 16.5 inches (42 cm). The extra height beneath the hatchery gives you extra room to open the valve when draining out the baby brine shrimp.
Kit does not include brine shrimp eggs, measuring spoon, air pump, heater, or other equipment.

Instructions for Hatching Brine Shrimp:
1. Fill to within 1 inch from the top with water. Use dechlorinator if your water contains chloramine.
2. Add 2 tablespoons of marine salt, like Easy Brine Shrimp Salt.
3. Add up to 1 tablespoon of eggs. Raise the temperature to 75–80°F.
4. Let hatch for 24-36 hours (or more depending on temperature).
5. Use a light near the bottom spout to attract the brine shrimp for collecting.
6. Collect the brine shrimp using a sieve or container.
7. Thoroughly scrub the hatchery and lid with hot water before hatching the next batch of eggs. Do not use soap.
We don't use the provided air stone in our setup as it makes cleaning harder between hatches. If you wish to use the air stone, you'll need to cut down the rigid tubing.


